Quabbin Cowl

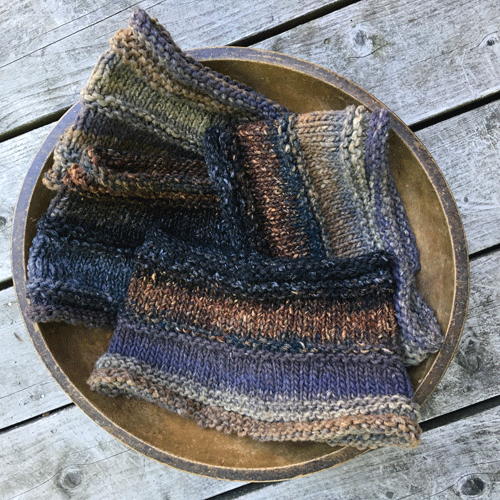
Are you ready to start your Christmas knitting? Here’s a quick and simple cowl I designed in two versions. One is totally straight and the other flares out at the base so it will fit into the necklines of your coats and jackets.

The yarn I used was Noro’s Iro, a bulky blend of 75% wool and 25% silk that knitted up at a gauge of 3.5 stitches per inch on size 10 1/2 circular needles. I needed less than a full 100g skein for either version. You can also use two strands of knitting worsted weight wool. I suggest you use a yarn with decent body as you don’t want this cowl to be too floppy.

Straight version:

Using your 10 1/2, 24″ circular needle, cast on 64 stitches. Join in the round.

Knit in stockinette (knitting all stitches) for six rows.
Purl a row.
Knit a row.
Purl a row.
Continue in stockinette for 10 rows.
Purl a row.
Knit a row.
Purl a row.
Knit in stockinette for another 10 rows.
Purl a row.
Knit a row.
Purl a row.
Knit in stockinette for six more rows.
Bind off.

Both the top and bottom of the cowl will roll, which provides a nice finish.
Flared version:

Cast on 80 stitches and join.
Knit in stockinette (all knit stitches) for six rows.
Purl a row.
Knit a row.
Purl a row.
Knit a row.
Next row: *Knit six stitches, Knit 2 tog, rpt from * until end of row. You will now have 70 stitches on your needle.
Knit six more rows in stockinette.
Next row: *Knit five stitches, Knit 2 tog, rpt from * until end of row. You will now have 60 stitches on your needle.
Knit a row.
Purl a row.
Knit a row.
Purl a row.
Knit in stockinette for 10 rows.
Purl a row.
Knit a row.
Purl a row.
Knit six rows in stockinette.
Bind off.

Save

Save

Save

Save

Save

Save

Sit. Knit. Pillow

Last night I finally finished a knitted pillow that I had started at least five years ago. Well, the front and back had been finished all this time, but I never got around to finding a pillow form for them. A post-Christmas trip into a craft store found bags of poly snow on sale and the size and shape of the bag jogged my memory of this long-forgotten project. I present it here for your knitting pleasure should you choose to knit one for yourself.

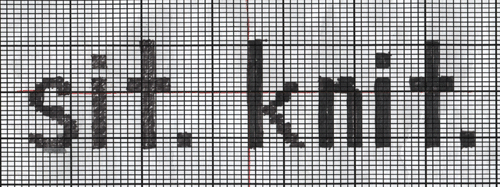
The graph below is one that I sketched out after making a suitable graph paper in a graphics program. No, I am no whiz at it, but I managed to make it work. If you can read it, you can use it to make your own pillow.

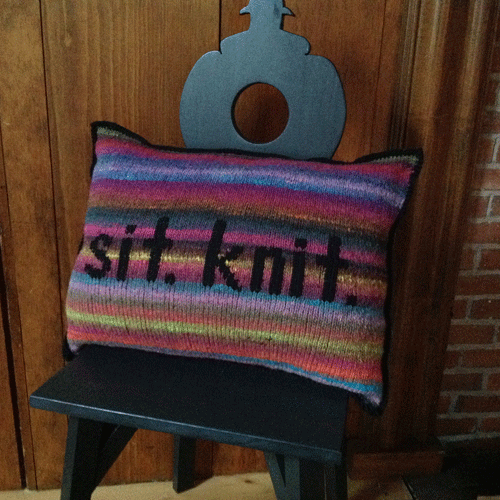
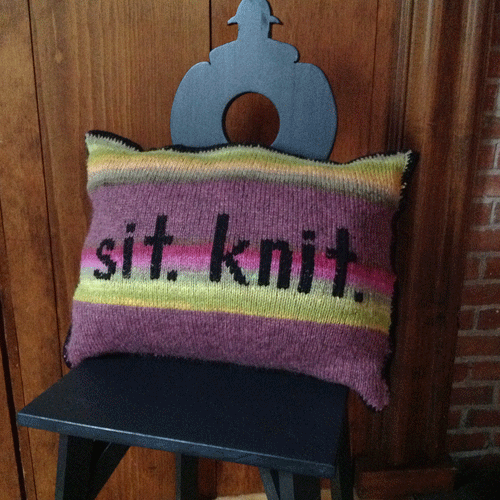
The pillow “recipe” or pattern is pretty loose. Grab a few skeins of Noro Kureyon or something similar (worsted weight), whatever is languishing in your stash. Knit up in stockinette two skeins for the front and two skeins for the back, then work the chart in duplicate stitch on each side, centering the lettering.

After finishing all the stitching, single crochet the two sides together, leaving an adequate opening for a pillow form or other stuffing.

Once the pillow is stuffed, finish joining the two sides with single crochet. I then did another row of SC all around to make it look a little better. Perhaps it needs a bit more? It’s up to you.

Here are the two sides of the pillow.

I hope you enjoy making your own.

Save

Save

Save

Are you ready?

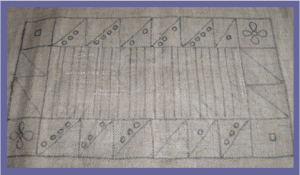
Have you been studying your photos? Have you picked out colors you would like to work with? HAVE NO FEAR! We're only going to make a small rug. Very small. No matter what colors you want to play with, you will not be penalized if no one else likes them. You will learn lots about what pleases YOU. Take the leap and go with your gut. Now that you have colors in mind, you need to assemble your materials. Don't worry about everything "going together." The whole point is to be surprised with what can work when you think it may not. I am going to hook a small piece, so I've drawn, with a fine point marker,  a simple pattern on a piece of linen. Actually, it's the backside of a pattern I didn't print on the straight. (We never sell such sins!) You'll notice that I have hooked a bit and pulled it out (the noticeable holes in the backing). Yes, you can "reverse hook" this way with no detriment to the backing. My pattern is about 9 1/2" x 17". You can make yours any size you like. Maybe you want to dip your toe into the waters with a smaller piece. I think about 8" square is the smallest you should go if you are planning on hooking with #8 (1/4") strips of wool. That way, you can fit in enough detail to make the experiment satisfactory. Here is the homely start of my little rug.


Where do you find inspiration?

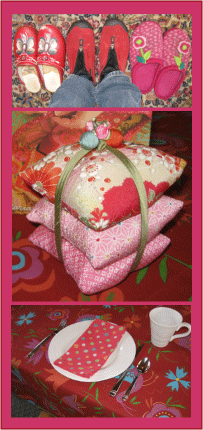
     Is it in a line-up of your happy shoes?

     Is it in a stack of pretty sachets?

     Is it in colorful table linens?

     Get out your camera and capture some images of things
     that please you from your own environment.  Over
     the next few weeks you will use those images to play
     with color and design.

     As you work out your own project, I will develop mine.
     You can do this in stitchery or rug hooking or whichever
     of the gentle arts is calling to you right now.

     I think this is going to be fun!